|
<< Click to Display Table of Contents >> Synchronized Data to Data Mart |
  
|
|
<< Click to Display Table of Contents >> Synchronized Data to Data Mart |
|
Synchronized Data to Data Mart : Periodically synchronize a dataset to a data mart on certain conditions
"Synchronized Data to Data Mart" will materialize current data set. It will generate corresponding materialized data set files in the cloud folder with the same level of bihome. When we call the data set once more, materialized dataset can be called. When there is a large amount of data in the database, use the materialized data set can greatly improve the data set speed.
When the user performs Materialize Data Set, local data mart should be configured in bihome\bi.properties file. Add the following statements in bi.properties.
dc.fs.sub.path=c\:/bihome/cloud/qry_sub.m
dc.fs.physical.path=c\:/cloud
dc.io.handlers=1
dc.naming.reds=1
dc.naming.waiting=3000
dc.naming.maps=1
dc.io.ip=192.168.1.99
dc.node.types=nmrc
dc.fs.naming.paths=c\:/bihome/cloud/qry_naming.m
➢Description: Users need to change c\:/cloud to their own path, and ip needs to be changed to their own host's ip.
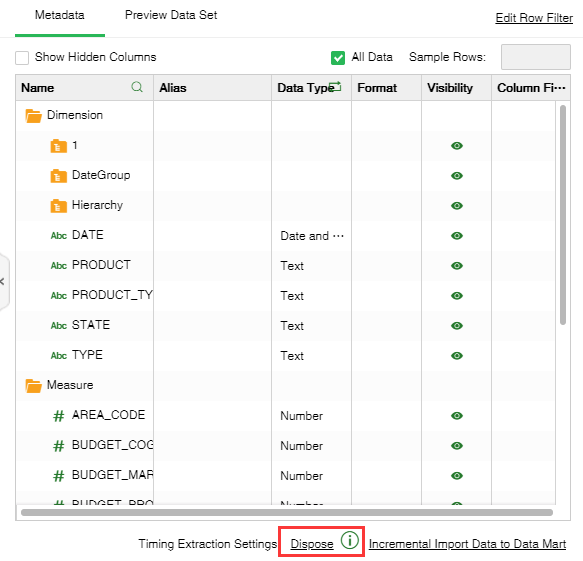
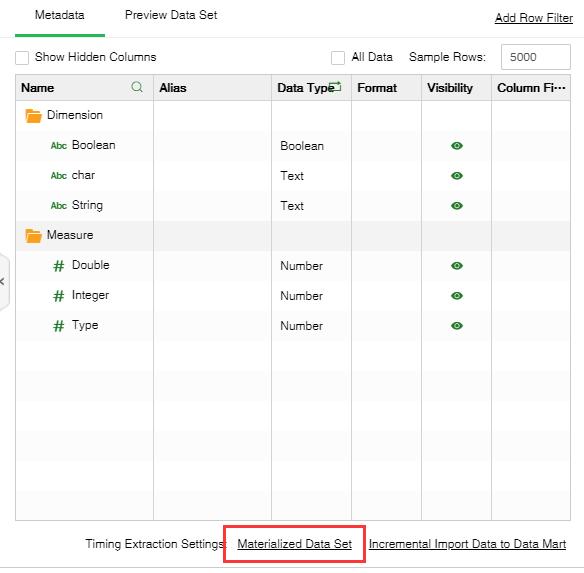
The materialized data set will display current data set as materialized data set in the metadata area of data set as shown in the following figure. When the user clicks the release button, the materialized data set file is deleted in the cloud.
The steps to create new "Synchronized Data to Data Mart" data are as follows:
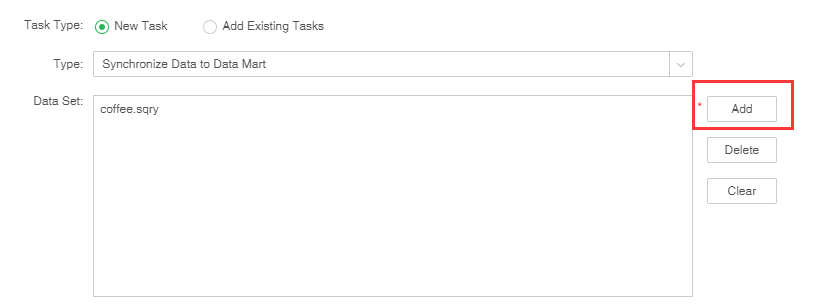
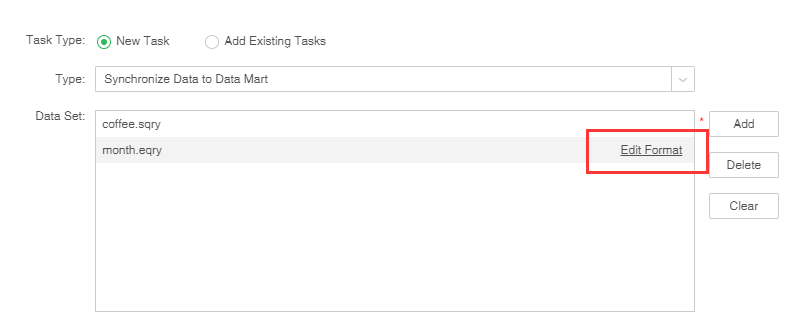
1.1 the first way:In the task area of the new job or the new task interface, select the task type as "Synchronized Data to Data Mart" as shown in the figure below.

1.1.1.Select the dataset that needs to be materialized. The user clicks "Add" to select one or more data sets that need to be synchronized in the existing data set. As shown below.
1.2 the second way:open Create Data Setselect the task type "Synchronized Data to Data Mart" as shown in the figure below.The system will automatically creates an incremental import job for the dataset and jumps to the scheduling task interface.
![%BEU4{C5%Y955N3T`BV9]]Q](hmfile_hash_afd8f20f.png)
2.In version 8.5, we update the data precision so that there is no precision problem when calculated large amounts of data, the number of precision bits supprot setting. Click the Edit Format button on the right side of the dataset to display the double, float type data columns in the dataset, and set the storage precision on the market folder. Different market folders can have different precisions, Double, float type data column default value is 4,as shown in the figure below.
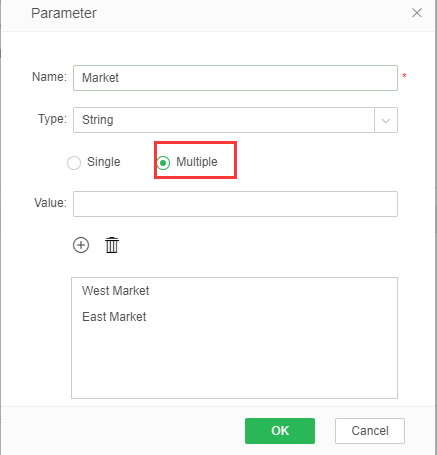
3.Setting parameters. The user clicks on the Collect button to collect all the parameters of the currently selected dashboard or dataset, including the name of the parameters (required), the parameter data type, and the parameter values. When the user needs to add a parameter, click the Add button to pop up the parameter dialog box. The user can set the name of the parameter, the data type of the parameter, and the parameter value.
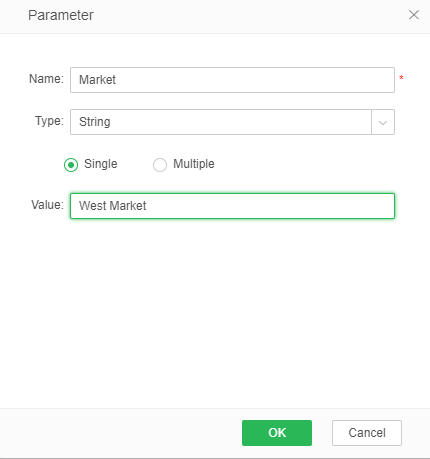
When the user selects multiple items, multiple parameter values can be set, as shown in the following figure.