|
<< Click to Display Table of Contents >> Create Freestyle Table |
  
|
|
<< Click to Display Table of Contents >> Create Freestyle Table |
|
❖Create the Freestyle Table
Drag the freestyle table component ![]() of the right side panel of the dashboard in the component to the dashboard editing area.
of the right side panel of the dashboard in the component to the dashboard editing area.
❖Bind data source
After creating a new freestyle table, it will automatically enter the binding mode, or select the freestyle table component to move the mouse to the toolbar of the component, and click the bind data button ![]() to open the binding interface of the freestyle table component. The binding interface of the freestyle table component is grayed out.
to open the binding interface of the freestyle table component. The binding interface of the freestyle table component is grayed out.
Binding method of the freestyle table:
1. Drag and drop the data segment to the freestyle table area to achieve binding, as shown in the figure:
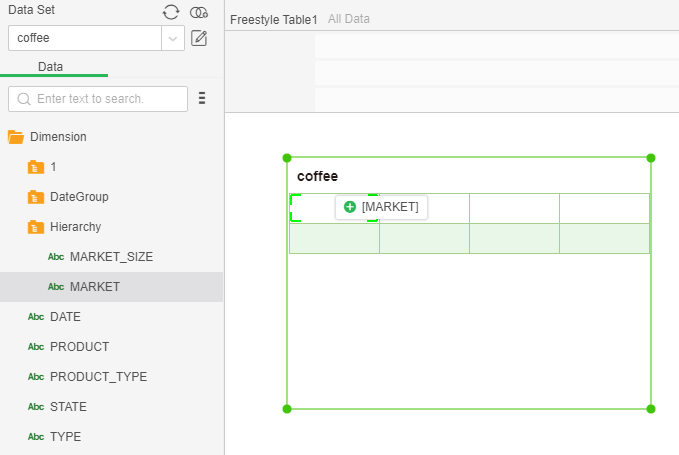
The horizontal and vertical arrows in the Freestyle table data section indicate horizontal expansion and vertical extension, respectively.
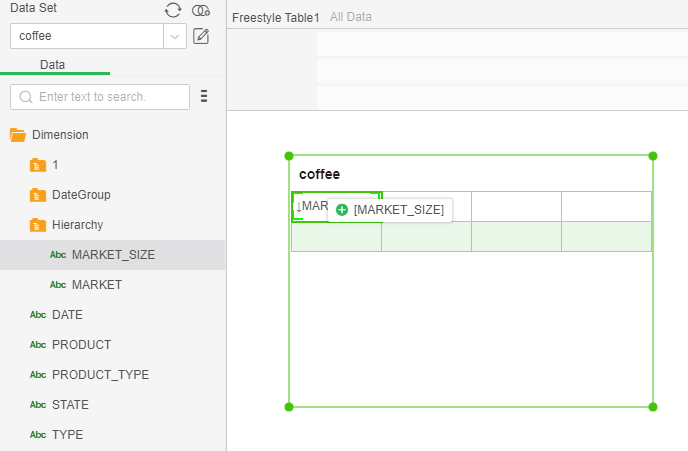
2. Drag and drop a data segment directly to the field to be replaced, you can replace the original data segment, as shown in the figure:
❖Remove data segment
Directly select the cell whose data segment you want to remove, and press the Delete key on the keyboard to remove the selected data segment.
❖Set up freestyle Table cells
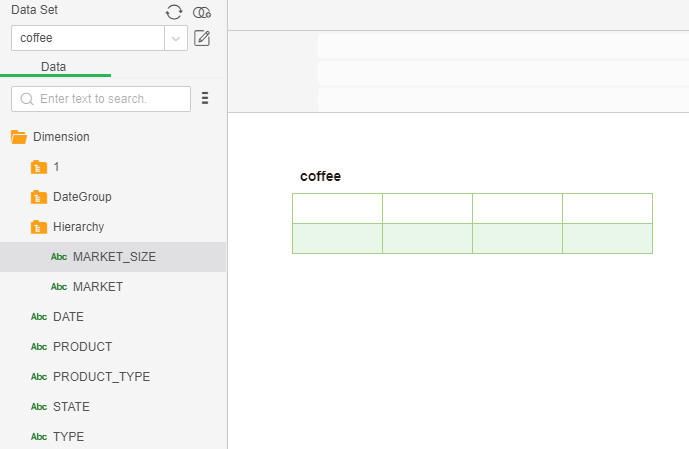
Drag and drop the freestyle table and click on the green binding data icon or click the bind data button ![]() on the component's toolbar. This is to associate the freestyle table with the corresponding data in the query. Which field is specifically bound? Need to enter the meta mode and binding through the corresponding settings, the following figure is bound to the freestyle table after the query, the default is two rows and four columns.
on the component's toolbar. This is to associate the freestyle table with the corresponding data in the query. Which field is specifically bound? Need to enter the meta mode and binding through the corresponding settings, the following figure is bound to the freestyle table after the query, the default is two rows and four columns.
In the binding mode, the freestyle table is selected and the form enters the meta mode. Select the cell in Meta mode and click Calculate in the right panel as shown:
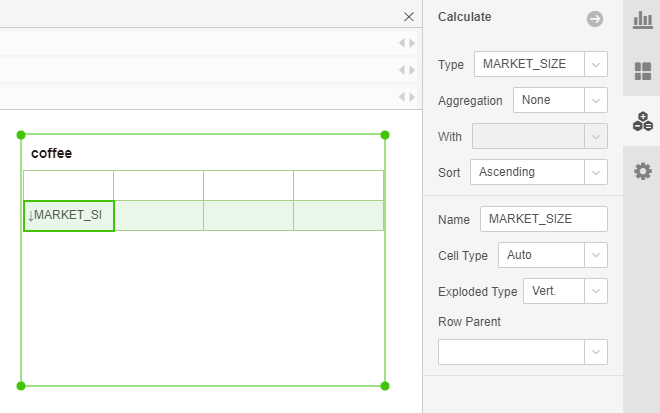
[Type] takes values in different ways, including constants, SQL formula (data sets), script formula (data sets), script formula (grid computing), columns.
Constants: This is what to see is what.
SQL formula (data sets):It is generally used to access columns, such as col["state"].
Script formula (data sets):Access columns, such as col["state"]; aggregate data, such as sum(col["sales"]); or any script.
Script formula (grid computing):The value that is cell(“cella”) of cell(dimension) can be referenced by cell name, or cell (1,3) by row and column coordinates. It is counted from 0. The cell also opens rsize and csize. They respectively indicate the total number of rows and total columns of the table, and ridx and cidx indicate the current number of rows and columns. When referring to a grid, if you use a name to refer to it, you need a dimension field.
➢Instructions:If cell (ridx, n), cell (n, cidx), cell (ridx, csize-n), cell (rsize-n, cidx) are used to calculate the grid, when inserting rows or deleting rows and columns, n can be updated automatically. The value maintains the original calculation result.
The expression for calculating the sum of rows and columns is rowTotal(int column, int rstart, rend) and colTotal(int row, int cstart, cend), where the parameter column represents the column where the row total is calculated, and rstart represents the starting row. Rend represents the end line; parameter row represents the row where the column total is calculated, cstart represents the start column, and cend represents the end column.
Columns: Refers to all the columns of the Freestyle table bound data source. However, calculators that do not display hierarchical relationships and aggregation metrics.
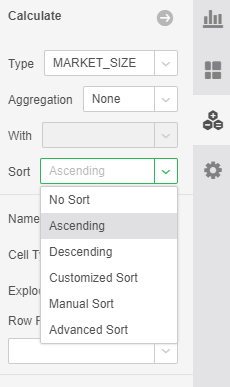
[Sort] Sort the fields into No sort, ascending, descending, customized sort, manual sort, and advanced sort. Click the option to open the corresponding edit window.
[Name] refers to the name of the cell. Constant: cell+ number; SQL expression (data set): SQL+ number; script expression (data set): script+ number; script expression (cell calculation): cellScript+ number; Dimension: column name; Measure: [Aggregate]_ Column name.
[Cell Type] In what way to extract data in the query, there are auto, group, detail, and aggregate.
[Exploded type] refers to the way the field is expanded. It can be expanded for none, horiz., or vert..
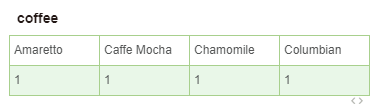
After selecting the horiz. extension type, click on the blank area of the dashboard to exit the table's meta mode or preview. The following picture shows horizontal expansion:
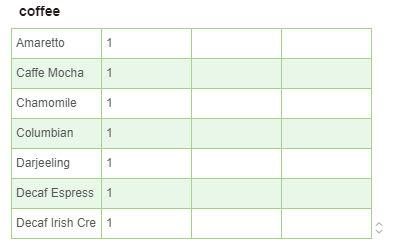
After selecting the vert. expansion type, click on the empty area of the dashboard to exit the metadata mode or preview of the table. The following figure shows the vertical expansion:
[Column Parent] You can select a parent cell and expand horizontally according to the expansion of the parent node.
[Row Parent] You can select a parent cell and expand it vertically according to the expansion of the parent node.
❖Set the number of headers, rows, and columns of freestyle tables
Set the number of headers, rows, and columns of the freestyle table in the right panel - Settings - Number of rows and columns, as shown in the following figure:
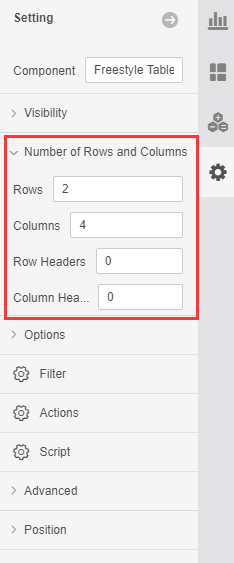
[Rows]The default number of rows is 2. You can set the total number of freestyle tables.
[Columns] The default number of columns is 4, you can set the total number of freestyle tables.
[Row Headers]The number of header rows defaults to 0. You can set the number of rows as headers. When a vertical scroll bar appears, the row set as the header row does not scroll with the scrolling of the vertical scroll bar.
[Column Headers]The column number of the header is 0 by default, and the number of columns as the header can be set. When a horizontal scroll bar is present, the column set as the header column does not scroll as the horizontal scroll bar scrolls.