|
<< Click to Display Table of Contents >> Create Form Parameter |
  
|
|
<< Click to Display Table of Contents >> Create Form Parameter |
|
❖Create the Form Parameter
Drag the form parameter ![]() on the right panel - component to the dashboard edit area.
on the right panel - component to the dashboard edit area.
❖Binding data
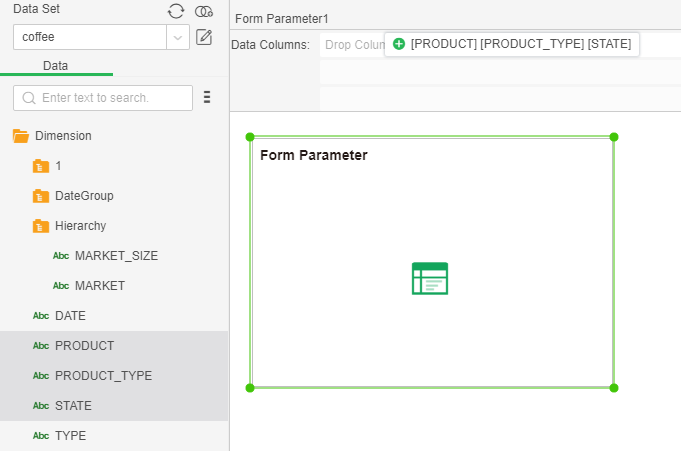
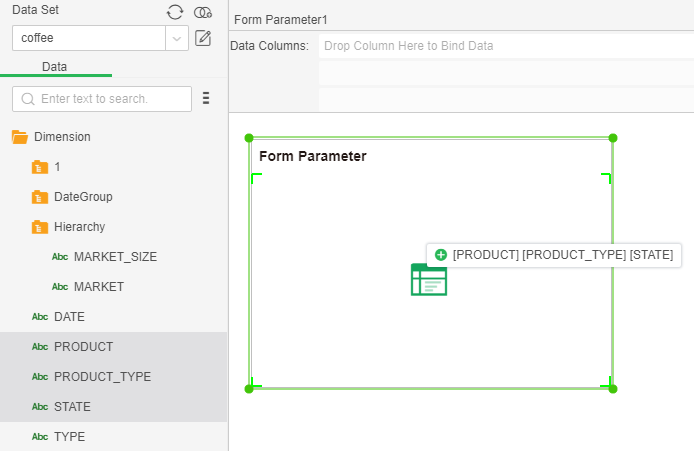
Select the form parameter and move the mouse to the toolbar of the component. Click the Bind Data button![]() to open the binding interface for the form parameter. The user can drag and drop the data to achieve the data binding to the form parameter. The form parameter is a detail table and does not support aggregation of measure data segments, but it can be achieved by clicking the icon
to open the binding interface for the form parameter. The user can drag and drop the data to achieve the data binding to the form parameter. The form parameter is a detail table and does not support aggregation of measure data segments, but it can be achieved by clicking the icon ![]() on the binding interface. The form parameter can receive any type of data segment, and the measure data segment can only be bound once.
on the binding interface. The form parameter can receive any type of data segment, and the measure data segment can only be bound once.
In the query tree, the Shift key is continuously selected, and the Ctrl key is not continuous. There are three ways to bind data segments:
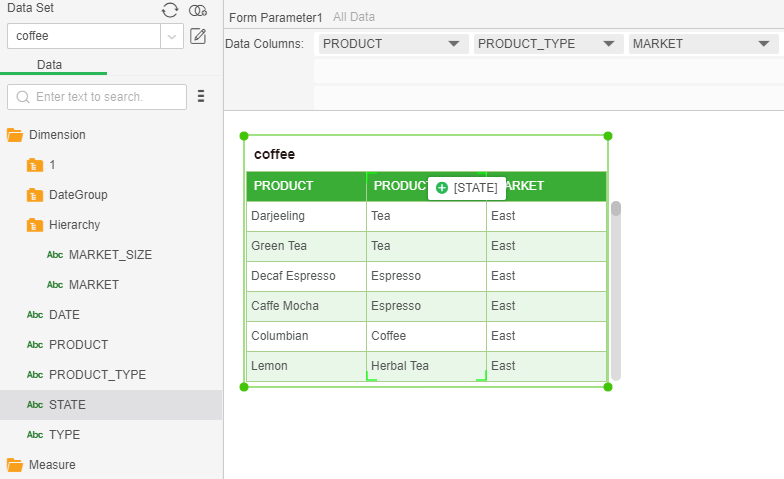
•Drag the data segment to the binding window to achieve binding, as shown in the figure:
You can also drag the data segment to the binding window to replace the binding;
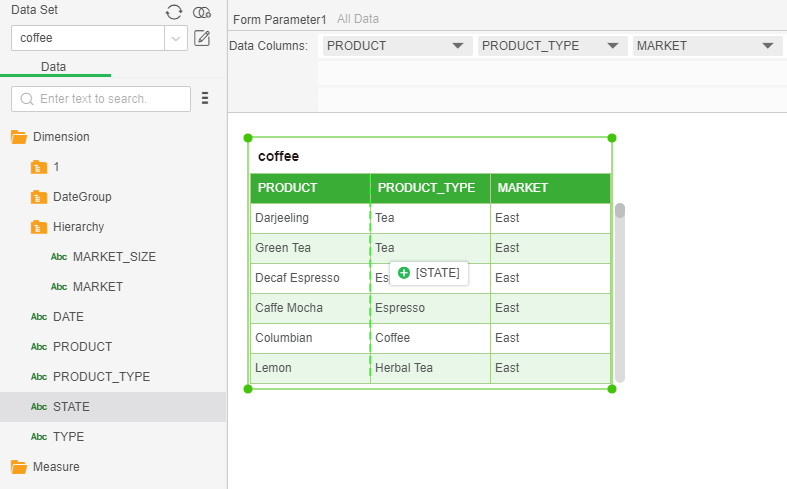
•Drag the data segment to the table area to achieve binding, as shown in the figure:
You can also drag the data segment to the table area to replace the binding. You can also drag data segments to insert bindings in the table area. Replace the style of the original data segment, as shown in the figure:
Insert the style of the original data segment .As shown in the figure:
•Double-click the data section of the query tree list to achieve binding.
❖Remove data segment
This product supports four ways to remove data segments:
•Select Delete in the drop-down list of the bound data segment;
•Drag and drop directly to achieve the data segment removal, drag the data segment to the query tree;
•Remove all data segments through the bind window's shortcut clear button;
•Drag the green triangle to the query tree to remove it. as the picture shows:
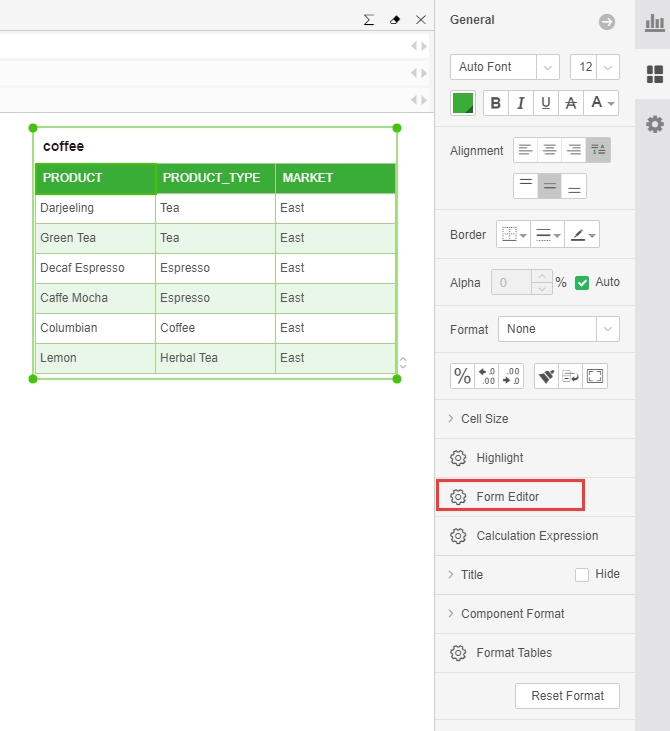
❖Edit header
Select the header of the form parameter component and click on the right panel - General -Form Editor to set the way to modify the data. As shown below:
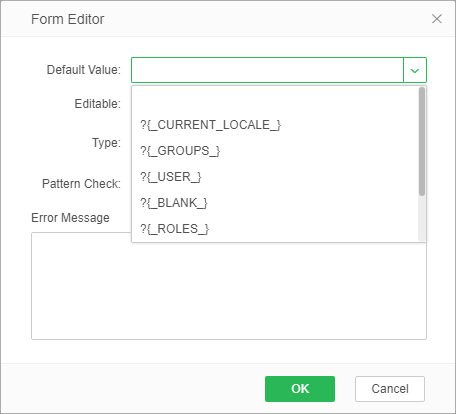
[Default value] Default value when inserting data in preview mode, the default is blank.There are two ways to set the default value: a direct input value, a parameter value.There are three ways to set parameters: system parameters, manual input, and collection of parameters added in the edit parameters. The default system parameters in the drop-down list include: _CURRENT_LOCALE_, _USER_, _BLANK_, _ROLES_, _USER_ALIAS_, _ROLE_ and _GROUP_;The parameters added in the edit parameters will be displayed in the drop-down list. As shown in the figure below, the parameter param is the parameter set in the edit parameters.
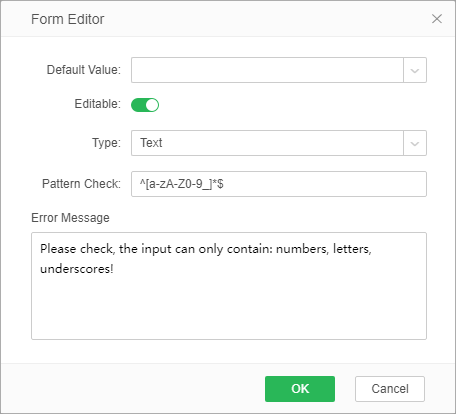
[Editable] When editing status is off, all buttons and input boxes are grayed out. This column is not editable in preview mode. After the editing status is turned on, you can edit the Type, Pattern Check, and Error Message as shown in the following figure:

[Type] When the default data type is in preview mode, you can manually enter the modified data. Different data types are different, and text is used as an example. When the type is text, the user can specify the regular expression to check the type of match, the user can also customize the error message.
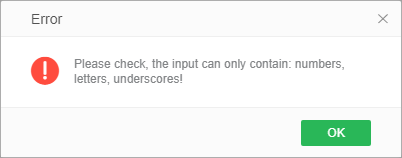
➢For example:enter the regular expression "^[a-zA-Z0-9_]*$" in the pattern check input box, and input "Please check, the input can only contain: numbers, letters, underscores!" in the error message. ,as the picture shows:
When the input types do not match, the message "Please check, the input can only contain: numbers, letters, underscores!" appears on the screen.
[Dropdown list] Drop-down list types include data set and embedded data.
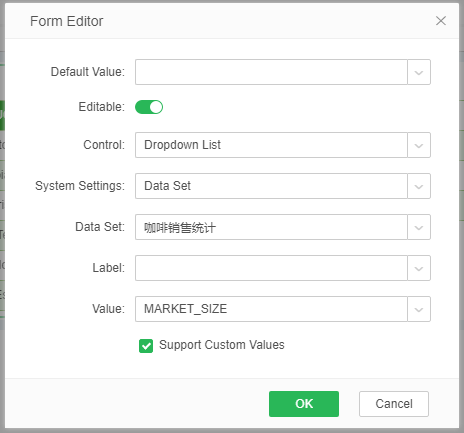
Data Set:If the data to be edited is the fixed data already in the query, the user can set the type as a Dropdown list, select the data set, set the value as the column in the data set, and then enter the preview mode, then the data can be selected directly. To change, the editing interface looks like this:
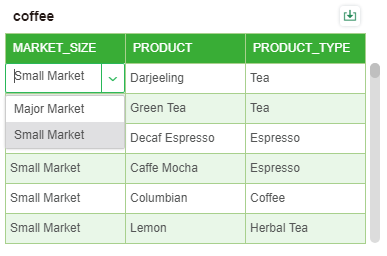
The selection value in the Dropdown list is set by selecting the data set and its columns, which defaults to the value of the currently bound column. After setting the value of the Dropdown list, the effect is as shown in the preview:
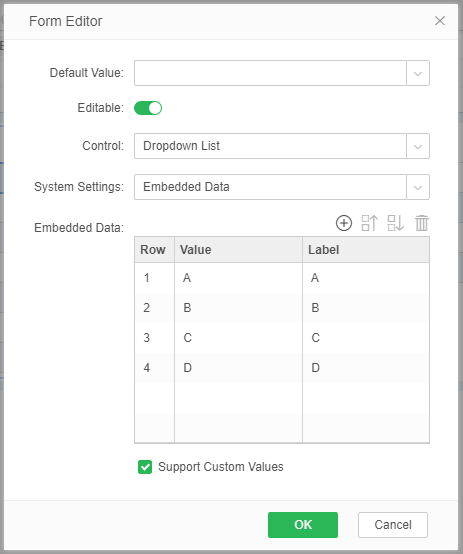
Embedded data: You can manually enter data. When entering the preview mode, you can directly change the data by selecting the data entered in the drop-down list. The data includes values and labels, and its editing interface looks like this:
After setting the value of the Dropdown list inline, the effect in the preview is as shown in the figure:
Be careful:
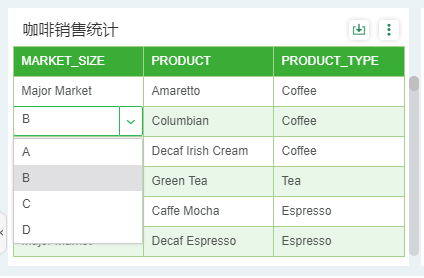
When the control type is "Dropdown List", the bottom option of the dialog box is set ![]() . When this option is checked, the option of market_size data in the example above can enter the customized values of"E, F, G"in addition to the four options of [A, B, C, D]; when the" Support Custom Values"is not checked, the column of market_size data can also be entered. The value can only be one of the four options [A, B, C, D].
. When this option is checked, the option of market_size data in the example above can enter the customized values of"E, F, G"in addition to the four options of [A, B, C, D]; when the" Support Custom Values"is not checked, the column of market_size data can also be entered. The value can only be one of the four options [A, B, C, D].
❖Set up a calculation expression
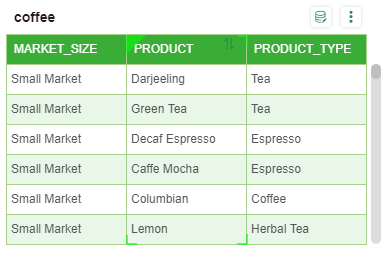
You can also set a custom calculation expression column in the form parameters. For example, the following table is available:
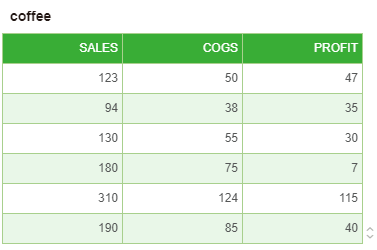
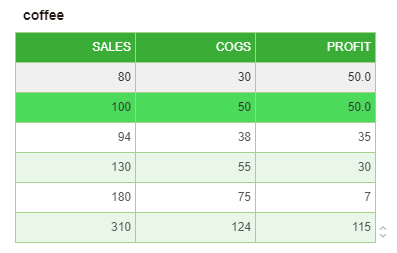
Select the header row PROFIT, click on the right panel - General - evaluation expression, enter the script:col["SALES"]-col["COGS"] in the open calculation expression, then change the SALES column or COGS in the preview The PROFIT column is automatically calculated when the data is listed. As shown below:
The modified column color is displayed in green, and the inserted column color is grayed out.
❖Set the Form Parameter
The submission of the form parameter component requires clicking on the right panel of the form parameter component-setting-form parameter, opening the form parameter window and setting it, as shown in the figure:
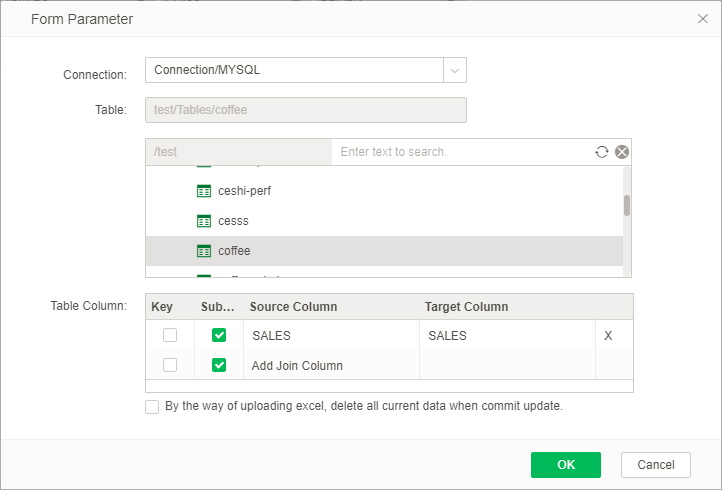
[Connection] Lists the data sources in all data sets. An empty data source means that no data source is selected.
[Table] After the connection is selected, the database and table of the connection selected by the data are automatically listed. If not, the refresh option in the right-click menu can be automatically loaded. After loading the table, you can search the table under the connection. For detailed usage, refer to the connection search section in Chapter 1, Introduction to Connection Data.
[Table Column] In the Table Column, the binding table and the fields of the table to be submitted to the database are one-to-one by matching the source field and the target field.
Key: Column submitted as a condition when submitted to the database, you can select a Table Column, you can also select multiple Table Columns. Unconditional columns cannot update and delete data.
Submit: columns that you want to be able to submit to the database, can not submit to the database when not checked.
Source Column: Fill in the field column to which the form parameter component is bound.
Target Column: The field of the table in the database to be submitted to, that is, the field of the selected table in the target table.
[By the way of uploading excel,delete all current data when commit update] Check this item to delete the current data in the component when importing Excel data in preview mode. Do not check this option. Do not delete the data when importing Excel data in preview mode. Fill in the current data in the component and compare the imported Excel data to update the data. Not checked by default.