1.概述
用户可使用Windows、Mac、Linux操作系统开发插件,此章节是在Windows操作系统下以采样插件为例,实现按比例抽样和有序抽样两个功能。
2.准备插件开发环境
参考下表准备插件开发所需环境。
工具 |
说明 |
版本 |
|---|---|---|
PyCharm(可选) |
作为插件工程的集成开发环境。 |
推荐最新版本 |
JDK |
插件是Java和Python的混合程序,编译过程需要Java。 |
8或11 |
DM-Engine |
为BI提供计算服务,如果需要在产品上查看插件的运行效果,建议安装。 |
2.0 |
AI-0.5.1-py3-none-any.whl |
插件SDK,开发插件必备,为插件提供了调用接口。 ➢注意: 插件SDK在0.5.1及更高版本才支持用户离线开发、打包插件。 |
0.5.1 |
BI |
通过应用管理功能安装插件,可以即时查看自己编写插件的运行效果。 |
9.4及以上 |
1)下载JDK8或JDK11并安装到系统,配置到Java到环境变量PATH中;如果环境变量已配置有现有Java路径,则该步跳过。
2)前往Python官网下载Python集成开发环境。建议使用Pycharm社区版(该工具方便编辑插件中的manifest.xml等文件及编写单元测试。如果对Pycharm工具不熟悉,请先学习如何使用,否则后续章节可能比较困难学习。
3)准备Python解释器,可以使用自己电脑上安装的Python-3.6.8,也可以使用DM-Engine2.0自带的Python解释器(Windows版本位于DM-Engine2.0/sre/py3目录,Linux版本位于DM-Engine2.0/sre/py3目录)。
4)下载永洪提供的插件SDK包AI-0.5.1-py3-none-any.whl 并通过命令python –m pip install –U ./AI-0.5.1-py3-none-any.whl安装到Python中。如果是用DM-Engine,需要先鼠标双击文件DM-Engine/bin/startDeployEnv.bat启动内置Python上下文命令行界面再录入该命令。
3.创建插件工程
1)解压DM-Engine 2.0安装包 。
2)双击启动DM-Engine 2.0/bin目录下的startDeployEnv.bat。
3)在启动页面输入命令:python -m yonghong -n D:\ITEM\Example\Plugin_Sample,创建Plugin_Sample插件工程。
➢说明:
D:\ITEM\Example\Plugin_Sample表示工程路径

4)使用PyCharm工具打开Plugin_Sample插件工程。
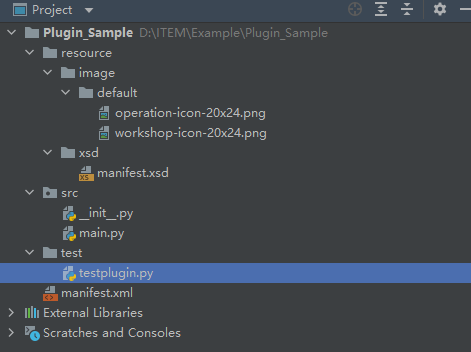
点击【File>Open】打开D:\ITEM\Example目录下的Plugin_Sample插件工程,并查看工程目录结构。如需了解更详细目录结构及资源信息,参考插件工程模板详解。
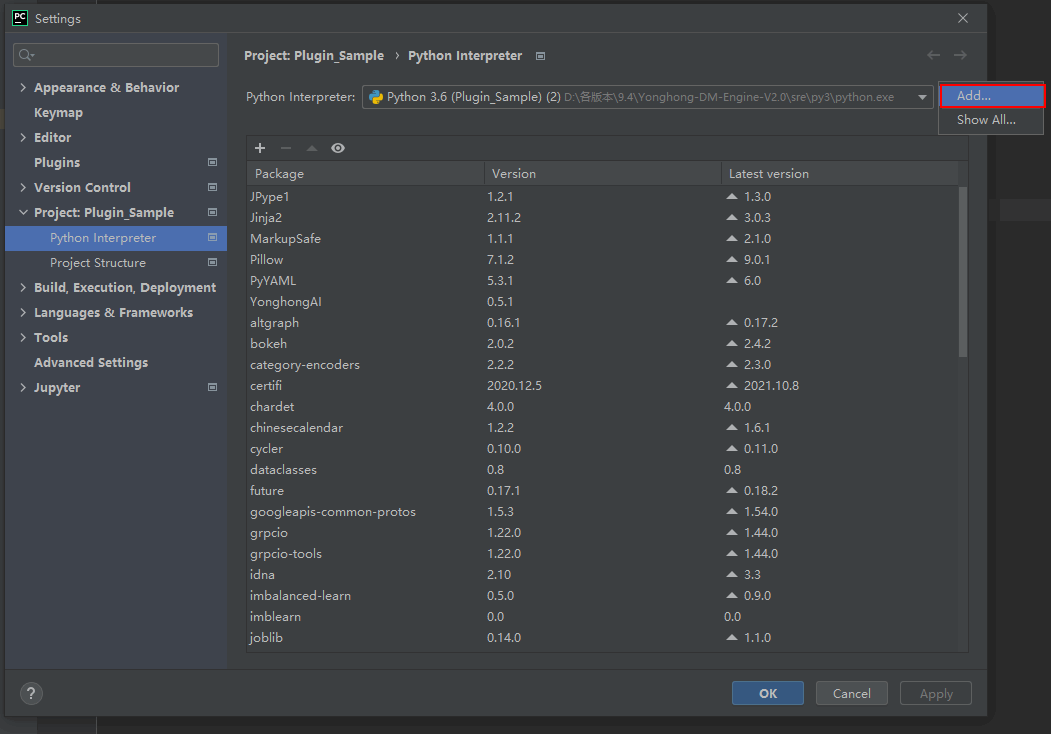
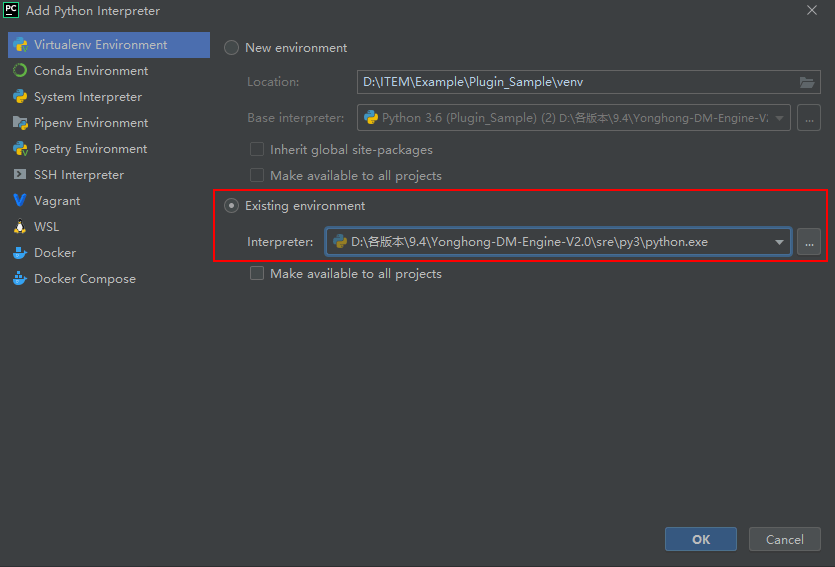
5)为Plugin_Sample工程指定DM-Engine 2.0自带的Python解释器。
点击【File>Settings>Project>Project Interpreter】,以添加新路径的方式选择DM-Engine 2.0自带的Python解释器的路径,点击OK,完成设置。下次如需再次使用此Pychon解释器,直接在下拉列表中选择即可。
4.编译插件工程
4.1编辑manifest.xml文件
manifest.xml文件信息如下:
<?xml version="1.0" ?><manifest xmlns:xsi="http://www.w3.org/2001/XMLSchema-instance" xmlns="http://www.yonghongtech.com" xsi:schemaLocation="http://www.yonghongtech.com ./resource/xsd/manifest.xsd">
<!--插件的版本号,必填项-->
<plugin-version>1.1</plugin-version>
<!--引擎的版本,用于运行时校验兼容性,仅展示,修改无效-->
<engine-version>2.0.1</engine-version>
<change-information>
1.1 版本变化
(1)深度分析插件算子国际化
</change-information>
<default-language>zh-CN</default-language>
<!--节点信息-->
<node>
<!--描述插件的用途、用法、注意事项等等-->
<description>
用途:
对样本进行采样操作
用法:
输入数据集,输出采样后的数据集。
有三种采样方式:
1.按照比例随机采样
2.按照数量随机采样
3.有序采样:根据样本总量和设置数量
注意事项:
无
</description>
<!--节点名,只可以是字母、数字、汉字、下划线的组合-->
<label>采样</label>
<!--节点存放目录,相对路径(相对于产品侧边栏树状结构目录的根目录),
可选的目录为在中文环境下有:/数据变换、/统计分析、/算法、/模型集成、/验证与评估,
在英文环境下有:/Transform、/StatisticalAnalysis、/Algorithm、/ModelIntegration、/Validate_Score,不允许缺省;-->
<path>/数据变换</path>
<type>transformer</type>
<hyperparameters>
<parameter>
<alias>采样方式</alias>
<name>sample_type</name>
<string-type>
<default-value>random_sample_ratio</default-value>
<optional-values>
<value>random_sample_ratio</value>
<value>ordered_sample</value>
</optional-values>
<dependent-parameters>
<item>
<selected-value>random_sample_ratio</selected-value>
<dependent-name>frac</dependent-name>
<dependent-name>replace</dependent-name>
<dependent-name>random_state</dependent-name>
</item>
<item>
<selected-value>ordered_sample</selected-value>
<dependent-name>n</dependent-name>
</item>
</dependent-parameters>
</string-type>
<description>
random_sample_ratio: 按照比例随机采样
ordered_sample: 有序采样
</description>
</parameter>
<parameter>
<alias>采样数量</alias>
<name>n</name>
<integer-type>
<default-value>1</default-value>
<scope>[0,]</scope>
<value-error>请填写大于0的整数</value-error>
</integer-type>
<description>设置采样样本量,大于0的整型数字</description>
</parameter>
<parameter>
<alias>采样比例</alias>
<name>frac</name>
<role>op_hyper</role>
<double-type>
<default-value>0.0</default-value>
<scope>[0.0,1.0]</scope>
<value-error>请填写[0,1]之间的小数</value-error>
</double-type>
<description>设置采样比例,[0,1]之间的小数</description>
</parameter>
<parameter>
<alias>是否有放回</alias>
<name>replace</name>
<bool-type>
<default-value>false</default-value>
</bool-type>
<description>
设置为True时,采样结果中可能有重复抽取样本
设置为False时,采样结果中没有重复抽取样本
</description>
</parameter>
<parameter>
<alias>随机种子</alias>
<name>random_state</name>
<integer-type>
<default-value>0</default-value>
<scope>(,)</scope>
<value-error>请填写整数</value-error>
</integer-type>
<description>当设置为0时,禁用随机种子</description>
</parameter>
</hyperparameters>
<used-columns>
<purpose>
<name>采样列</name>
<mapping-key>selected_columns</mapping-key>
<count-constraint>[1,]</count-constraint>
<value-error>至少选择一列</value-error>
<description>选择需要采样的列</description>
</purpose>
</used-columns>
<outputs>
<output>
<name>数据集</name>
<type>dataset</type>
<description>可以作为其他算子的输入</description>
</output>
</outputs>
</node>
</manifest>
参考下表了解标签说明。
父标签 |
子标签 |
标签说明 |
|---|---|---|
manifest |
plugin-version |
插件版本 |
engine-version |
引擎版本 |
|
change-information |
版本更新信息 |
|
node |
description |
插件描述 |
label |
插件名称 |
|
path |
插件路径 |
|
type |
插件类型 |
|
hyperparameters |
超参数设置 |
|
used-columns |
选定列的组 |
|
outputs |
插件输出 |
|
hyperparameters |
parameter:采样方式 |
超参数 字符串下拉列表选项 |
parameter:采样比例 |
浮点型数值范围,根据scope标签校验 |
|
parameter:放回 |
布尔值下拉列表选项 |
|
parameter:随机种子 |
整型数值范围,根据scope标签校验 |
|
used-columns |
purpose:采样列 |
选择在哪些列上进行采样 一个purpose标签代表一个特定目的的字段列表,传递至代码中使用 |
outputs |
output:数据集 |
输出采样后的数据集 |
4.2编译utils.py
在src文件夹下新建utils.py,编写有序采样函数。
utils.py文件信息如下:
def systematicSampling(dataMat, number):
length = len(dataMat)
k = length // number
sample = []
i = 0
if k > 0:
while len(sample) != number:
sample.append(dataMat[0 + i * k])
i += 1
return sample
4.3编译main.py
在main.py中可将刚编写完成的函数引入,并编写主体运行流程。
main.py文件信息如下:
from yonghong.plugin.base import BasePlugin
from src.utils import systematicSampling
class Plugin(BasePlugin):
"""An Entry class for running your plugin.
"""
def __init__(self, port_input=None):
super().__init__(port_input)
def on_run(self,
sample_type:str='random_sample_ratio',
n:int=1,
frac:float=0.0,
replace:bool=False,
random_state:int=0
) -> None:
##################################################################
# It's the best practice to check whether these input parameters is legal or not at first.
df = self.input_port.dataset.reset_index(drop=True)
if n > len(df):
raise ValueError('【采样数量】不能大于总样本量,样本总量:{}'.format(str(len(df))))
##################################################################
# Write your business logic below.
selected_columns = self.input_port.columns['selected_columns']
if sample_type == 'random_sample_ratio':
if random_state == 0:
self.output_port.dataset = df[selected_columns].sample(frac=frac,replace=replace,random_state=None)
else:
self.output_port.dataset = df[selected_columns].sample(frac=frac, replace=replace, random_state=random_state)
elif sample_type == 'ordered_sample':
df_index = [i for i in range(len(df))]
selected_index = systematicSampling(df_index,number=n)
self.output_port.dataset = df.loc[selected_index,selected_columns]
return
参考下表了解代码说明。
代码 |
说明 |
|---|---|
sample_type:str='random_sample_ratio', n:int=1, frac:float=0.0, replace:bool=False, random_state:int=0 |
自定义参数变量 |
input_port |
插件的输入数据端口 |
input_port.dataset |
获取输入端口的数据集,来自前置节点 |
input_port.columns |
从输入端口获取用户填写的字段,是有序列表 |
output_port.dataset |
向插件的后置节点输出数据集,dataset变量是pandas.DataFrame类型 |
5.编译插件测试代码
单元测试根据需要在工程test目录中自行定义,建议使用unittest框架。
1)准备测试数据。
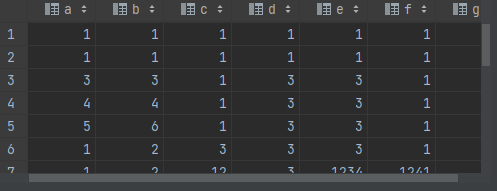
可通过两种方式测试代码。方式一:从外部读取测试数据;方式二:从sklearn.dataset模块引入数据。该实例采样方式一从外部读取make_classification_multi.csv文件中的数据。

2)编译testplugin.py测试代码。
testplugin.py文件信息如下:
from unittest import TestCase
from src.main import Plugin as YonghongAIPlugin
class Test_Plugin(TestCase):
def setUp(self):
pass
def tearDown(self):
pass
def test_run(self):
from yonghong.plugin import port
import pandas as pd
self.test_input = port.Input()
self.test_input.dataset = pd.read_csv('make_classification_multi.csv')
self.test_input.columns = dict()
self.test_input.columns['selected_columns'] = ['a', 'b', 'c', 'd', 'e', 'f', 'g']
plugin = YonghongAIPlugin(self.test_input)
plugin.on_run(
sample_type='random_sample_ratio',
frac=0.8,
replace=True,
random_state=0,
)
print(plugin.output_port.dataset)
参考下表了解代码说明。
代码 |
说明 |
|---|---|
self.test_input = port.Input() |
实例化input对象 |
self.test_input.dataset = pd.read_csv('make_classification_multi.csv') |
从csv文件读取数据集 |
self.test_input.columns['selected_columns'] = ['a', 'b', 'c', 'd', 'e', 'f', 'g'] |
指定数据列 |
sample_type='random_sample_ratio', frac=0.8, replace=True, random_state=0, |
设置超参数运行on_run函数 |
print(plugin.output_port.dataset) |
预览输出数据集 |
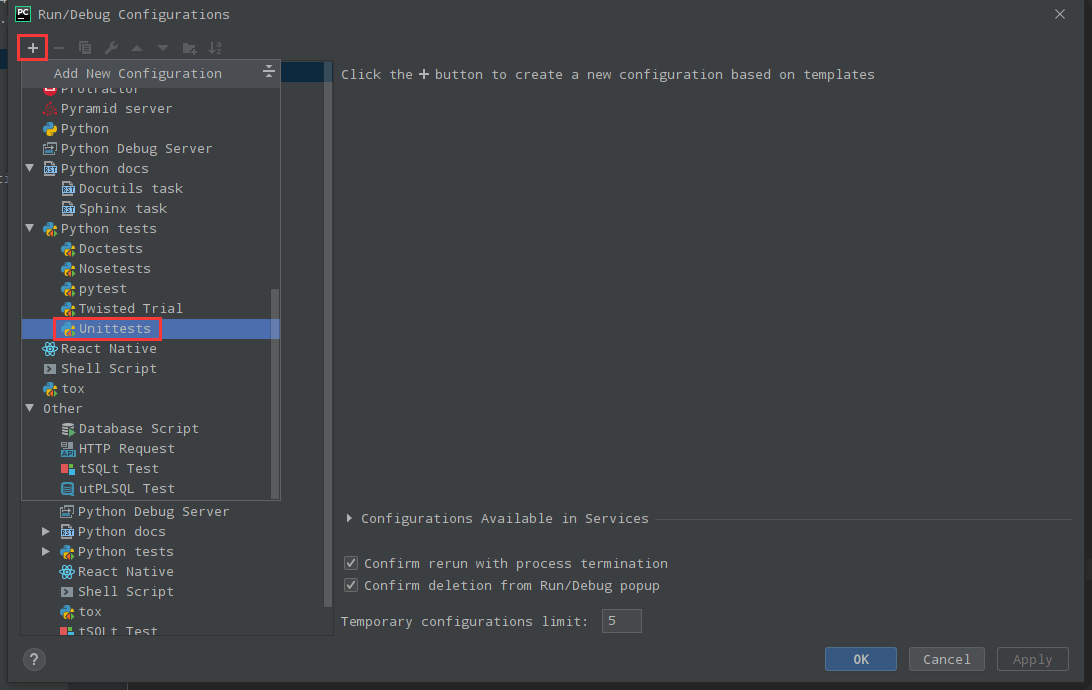
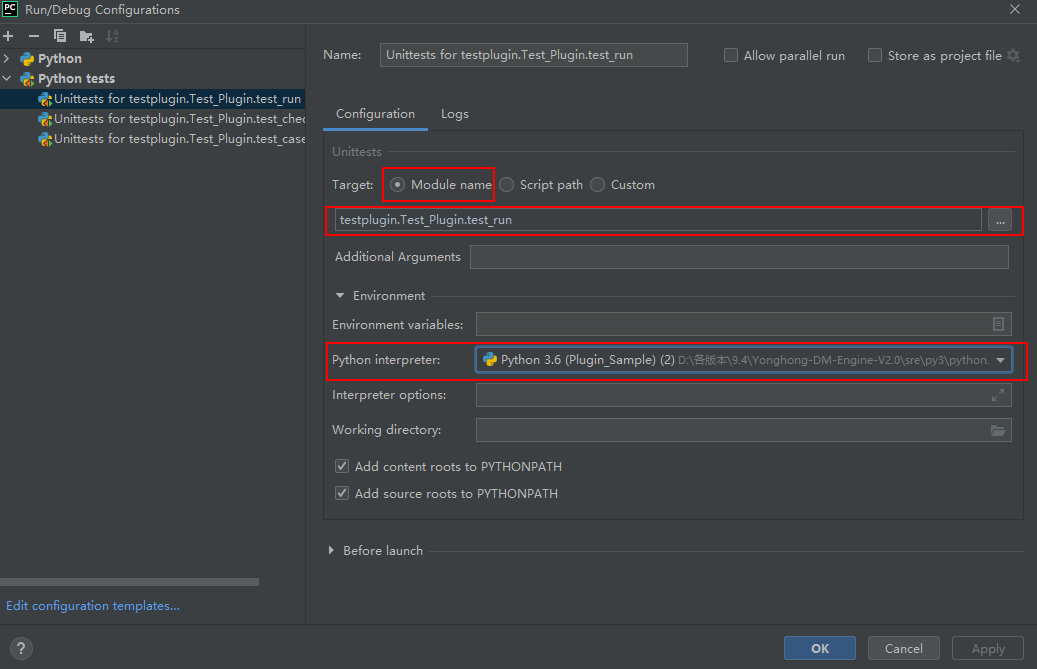
3)为PyCharm测试添加配置与Unittests。
a)点击Add Configuration。
![]()
b)点击添加按钮,在弹出的Add New Configuration界面选择【Python Tests>Unittests】。
c)设置Unittests,确认信息后,点击OK。
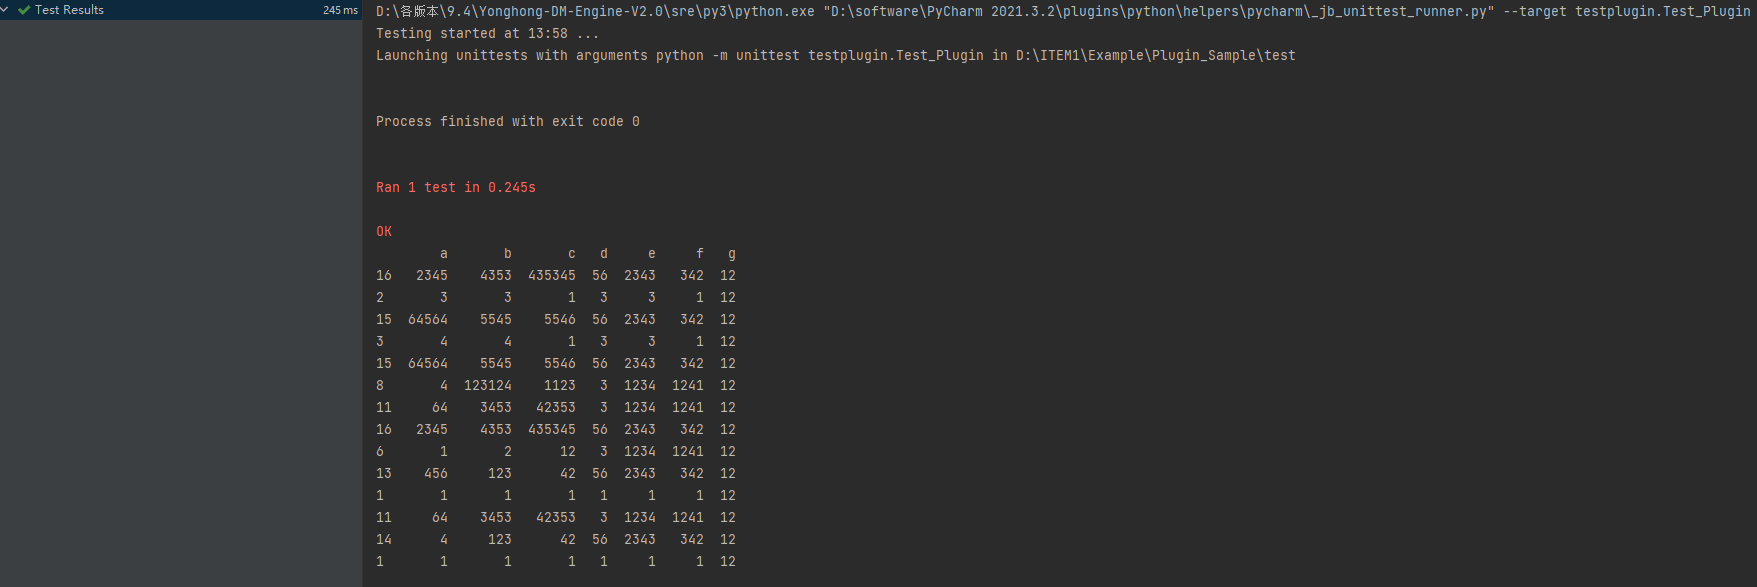
d)点击Run或Debug。

运行结果如下:
6.检查插件(可选)
该步骤不是必须的。该步主要是检查插件工程编写有无不规范的地方。在已启动的startDeployEnv.bat界面中执行检查插件工程的命令:python -m yonghong -c D:\ITEM\Example\Plugin_Sample, 如果工程存在不合规范的地方,将会给出错误提示,请根据操作提示修改正确。
6.生成插件
插件代码编写完成后就可以开始构建插件包。
在已启动的startDeployEnv.bat界面中输入命令 python -m yonghong -b D:\ITEM\Example\Plugin_Sample D:\test
➢说明:
•D:\ITEM\Example\Plugin_Sample表示工程路径
•D:\test表示插件的生成路径
生成后的采样.jar包文件

7.安装和使用插件
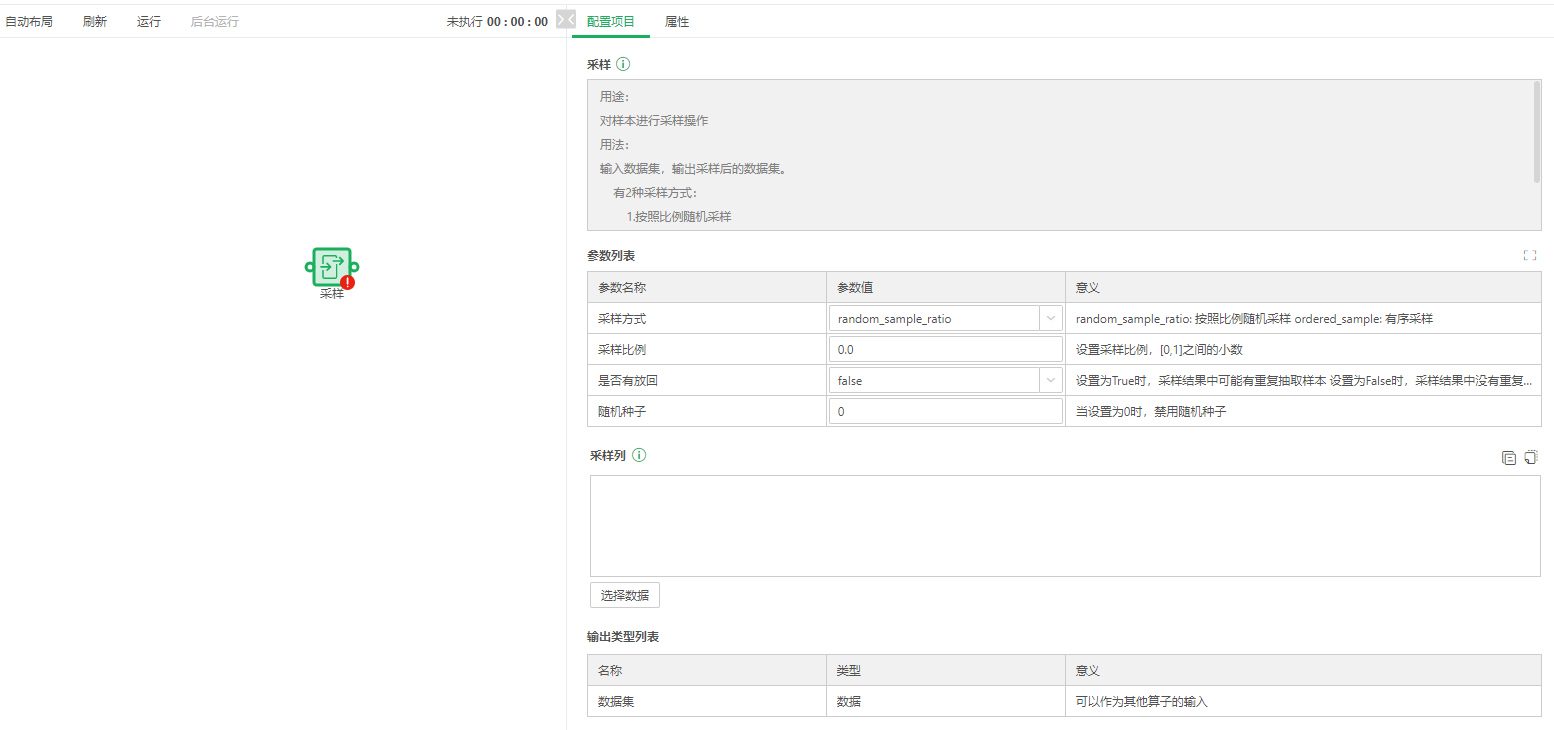
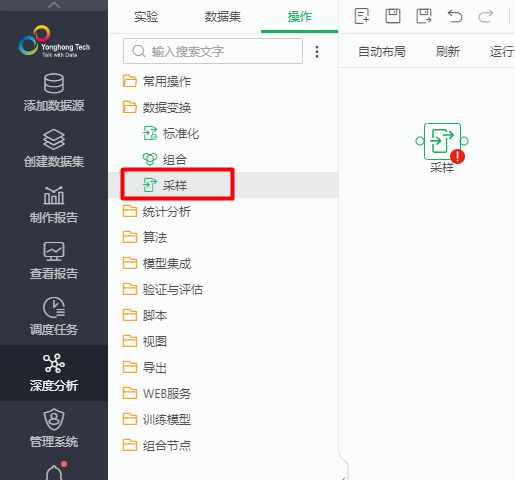
参考插件管理章节成功安装插件后,在深度分析的操作选项卡页面的数据变换/采样即安装后的插件。
查看采样插件的配置,在manifest.xml定义的大部分数据都在配置项目中显示。